| So you want to learn how to use PXTone? |
|
I'm probably not going to be the first to say that PXTone has an interesting learning curve for those who have little to no knowledge in the field of music writing programs. Specifically, the interface is sleek, but can be difficult to navigate for those who don't have a map. It would be best to download the software first. [Download] - NOTE: There has been a software update! The new file's number is 0.9.0.3! These new files are not compatible with the old versions! [Special thanks to Sega for help with the Key Porta] Learning the interface 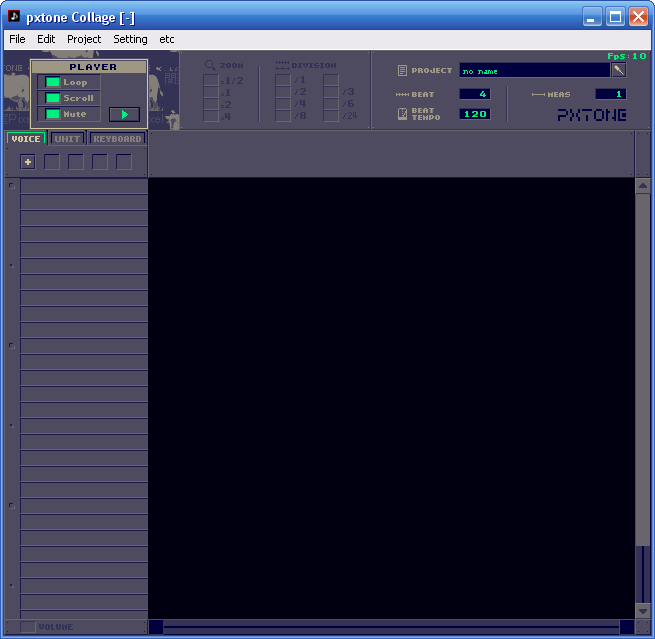 Let's take a look at the different parts of the interface to get a better idea of what they do. For now, let's focus on the top menu bar. It has a few different commands which, while hard to find sometimes, are extremely useful.
File - This one should be familiar to you, if you use most programs. It has the options to Load, Initialize, Save, and Export. Edit - While this looks important, you'll learn later that most of these commands can be used more quickly using The Green Bar. The only command that's really useful is the Undo command. Project - You'll learn that this is one of the more useful commands. It contains Effect and Comment. Effect is used to add an echo effect to your song. You are allowed two effects per song. I will go over this much more when we get to editing. Setting - This tab is for you to edit exactly how your player will export. Most of the options are already set, so you shouldn't really have to mess with this one. The Project Panel  The project panel is used to set the rudimentary settings for your song. To use it, click on the little  button. It allows you to set the song name, beat, tempo, and how many measures are in the song. It also shows you how long your song is, and how large. button. It allows you to set the song name, beat, tempo, and how many measures are in the song. It also shows you how long your song is, and how large.The Player Window
Putting it all together I know what you're thinking. "When the hell do we get to making a song?" Well, congratulations, if you've read all that stuff above, you've finally arrived at the part where we learn to make music! Getting instruments The first thing you're going to have to do is get yourself some instruments to work with. PXTone comes with sample instruments for you to use, and you also have the ability to put in your own in several ways. Let's first figure out what we want to do. You're going to have to use the Voice, Unit, and Keyboard tabs in order to edit your music. The Voice Tab
Looking at it, it doesn't really seem like that much, but The Voice Tab is the first step to making yourself a song. Pressing the little [+] key, you can import .ptvoice files, which are 16 bit synth voices that can be made using the accompanying program "ptVoice", (Will write a tutorial for that later.) or you can import .WAVs into your program to use as instruments or sounds. (It was the only way I could get good sounding strings.). You can also import "ptnoise" files, but the creation of these files is a mystery to me. Now, let's import a few of the instruments that come with the program into our song. My favorite is 003-sineString.ptvoice, so let's doubleclick on that.
The Unit Tab
Well, it looks like our instrument is ready to play! But... how exactly do we make it do so? If you click to the right of the instrument, you can make it make noise, and even specify how long it should be making that noise, but you cannot specify what note to play. That's where the Keyboard Tab comes it. Ready? The Keyboard Tab Welcome. Before we go on, why not take a break if you've been reading this whole thing? Well, if you're ready. Let's get at it. The Keyboard Tab is the key (oh god sorry for that pun) tool to making the music, but it's often a tough little bit to handle.
The Green and Red Bars One of the more interesting ideas that was implimented was The Green Bar, and The Red Bar. The Green Bar is used to edit your music. It's the software's form of Highlighting. You can select an area from one or multiple instruments to copy and paste into different areas. Let's give this a try. While in the Keyboard Tab you can click and drag to select parts of the music. Right-clicking shows you actions you can take after. While in the Unit Tab You can do the same thing, but with multiple instruments by selecting them while holding down CTRL. The Red Bar The red bar is a control function that allows you to specify where you wish to (temporarily) start the song from. This is useful for long songs where you cannot possibly sit there waiting to get to the part you need to hear. You can specify the End as well, just in case you want to see how something loops alone, without playing the whole song. The red bar also allows you to specify Repeats. Right-clicking on the red bar allows you to place the beginning and end of a repeat. What will happen is during the song, if the song ends, it will return to the repeat instead of the beginning of the song. (For some reason, there's a Last function, but all it does is set the end of the song early, the same as End.) Try working with these tools in order to make longer songs easier to accomplish. Zoom and Division
Effects You may remember before how "effects" were mentioned, and I said I'd go over them later. Welcome to later. Effects are echos that can be placed on certain instrument groups. You have 2 effects, and 4 instrument groups. (Why this is, I'm unsure.) Go into the effects menu and edit Delay[0]. Frequency is to specify how far apart the echos are, and Rate is to specify how loud each progressive echo is. And Group is which Instrument Group you're placing this effect on. Volume effects and Instrument Groups
Velocity - This is each notes beginning volume. I rarely use this, for there's a much easier tool to use for it. Volume Pan - Controls speaker pan so you can put different instruments at different places in the speaker. Stereo sound. Volume - Click-and-drag volume control. Allows you to set a definate volume for every note, along with Velocity. Key Porta -
From here, at the point where the note is to start sliding up or down to the next note, use the finger tool and write in the second note from that point to the end of the note's duration.
It will automatically keep playing the same sound at the different rate.) From this point, you need to specify your portamento speed. To do this, select the Key Porta option from the bottom left, where the other volume controls are. To work it, simple click and drag from a point before or at the beginning of the note to be effected. The longer the line you draw, the longer it takes for the note to bend to the value of the next note. Watch out! Setting the porta value too high can cause the note to not even reach the second note! If this occurs, it will stop at whatever value it was at when the second note started playing and continue playing at that value until the note ceases. Hopefully this was enough to cover everything needed about Portamento! Voice Number - Use this to actually change a slot's instrument to another instrument from the pallette! Quite versatile. Group Number - Use this along with the Effect menu to specify which instruments are effected by your echoes. Key Correct - If a sample you use is slightly out of tune, you can use this to correct it and reset it to the right pitch. Congratulations! You now know everything you need to know to get started writing music with PXTone! Please feel free to send questions, comments, possible corrections, or even songs (I host free of charge!) to George@buzinkai.net! Thanks for the support, and keep writing. |


